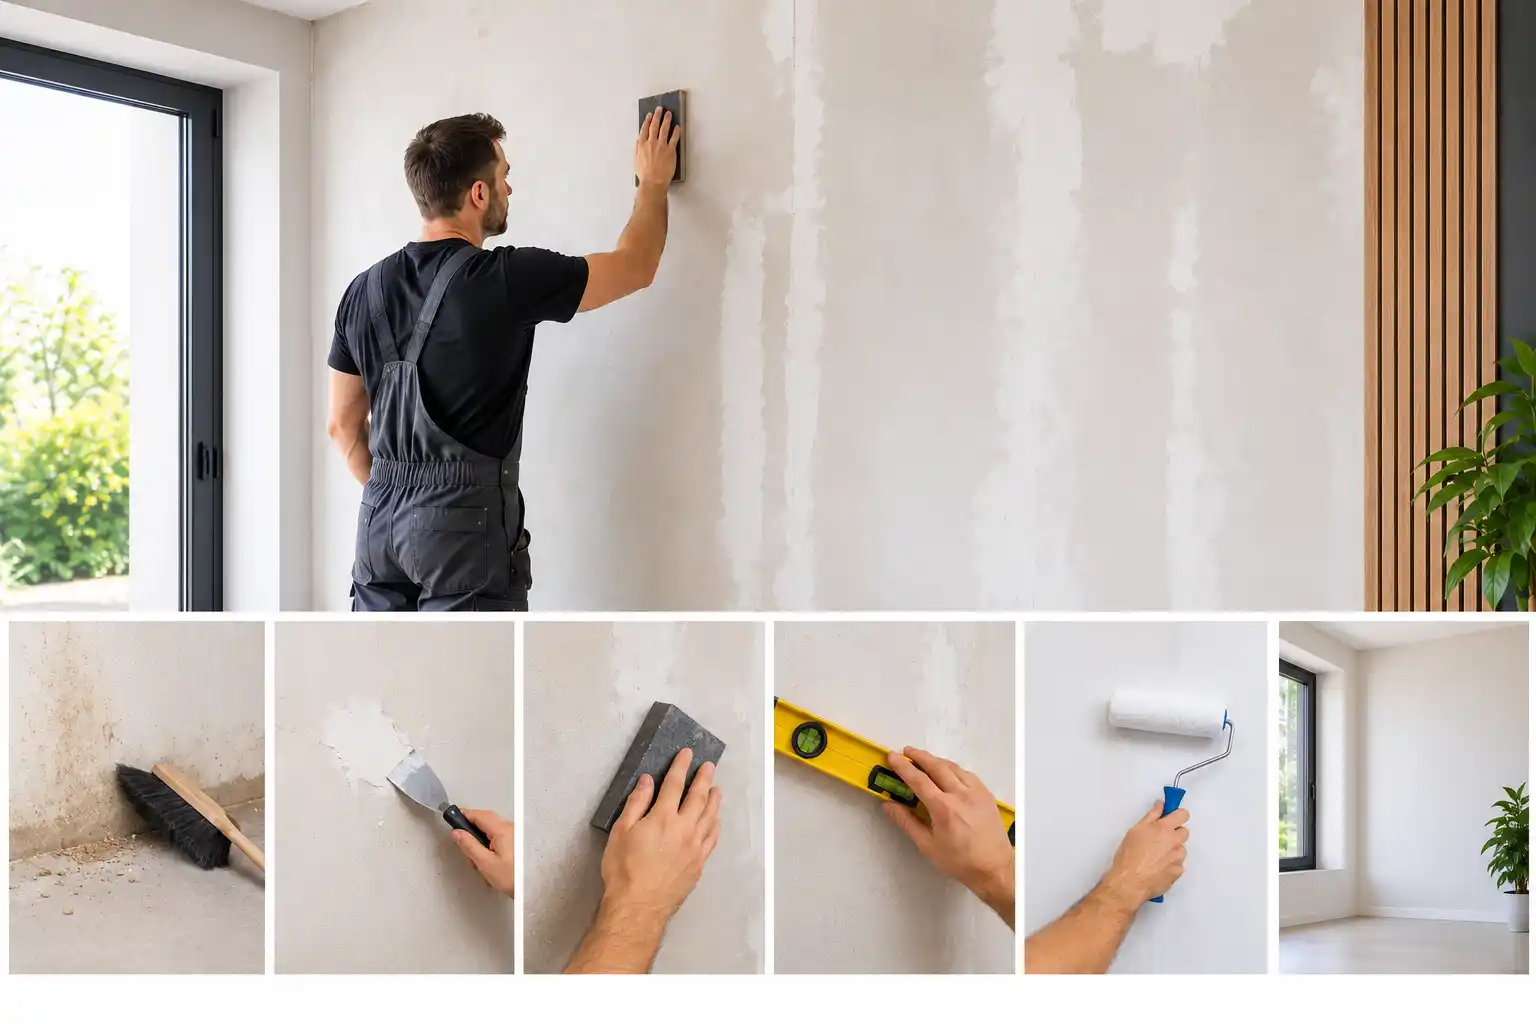
Installing PVC wall panels can be an effective way to update interior walls with a clean and modern finish. However, the quality of the final result depends heavily on the condition of the surface underneath. Proper wall preparation helps create a suitable base for installation and reduces the risk of uneven panels, poor adhesion and visible imperfections.
Before fitting PVC wall panels, it is important to inspect the existing surface, remove dirt and loose materials, repair damaged areas and check for moisture. Taking these steps can make installation easier and help achieve a more consistent finish.
In this guide, we explain how to prepare walls before installing PVC wall panels, covering surface inspection, cleaning, repairs, levelling and other important considerations.
Key Takeaways
- Inspect walls for cracks, dampness, loose paint and structural damage before installation.
- Clean the surface and remove dust, grease, wallpaper and loose materials.
- Repair holes and uneven areas to create a suitable installation base.
- Check wall levels and measurements before positioning the panels.
- Always follow the PVC panel manufacturer’s installation and adhesive guidelines.
First, let’s understand why preparing the wall is an important part of PVC panel installation.
2. Why Is Wall Preparation Important Before Installing PVC Panels?
Preparing the wall before installing PVC panels helps create a stable and suitable surface for the installation. Skipping this stage can lead to problems with panel alignment, adhesion and the overall appearance of the finished wall.
2.1 Improves Panel Adhesion
Dust, grease, loose paint and other surface contaminants can interfere with adhesive bonding. Cleaning the wall properly helps create a better surface for adhesive application, where the chosen installation system requires it.
2.2 Creates a Smooth and Even Finish
Cracks, holes and uneven sections can affect how PVC panels sit against the wall. Repairing these imperfections helps reduce visible gaps and creates a more consistent finish.
2.3 Helps Identify Moisture Problems
Installing panels over damp walls can conceal existing moisture issues. Inspecting the surface beforehand allows you to identify leaks, condensation or damp patches and address their causes before installation.
2.4 Reduces Installation Problems
A properly prepared surface makes measuring, positioning and fixing panels more straightforward. It also helps installers identify areas that may need additional preparation before work begins.
2.5 Supports a Better Long-Term Finish
Correct preparation helps reduce the risk of installation-related problems, such as loose panels, uneven joints and poor alignment. Following the manufacturer’s preparation and installation instructions is essential for achieving the intended result.
Once you understand the importance of preparation, the next step is to inspect the existing wall condition before starting any installation work.
3. Inspect the Wall Before Installing PVC Panels
Before cleaning or repairing the surface, inspect the existing wall carefully. Identifying damage, moisture and uneven areas early helps determine what preparation is needed before fitting PVC wall panels.
3.1 Check for Cracks and Holes
Look for visible cracks, holes and damaged plaster. Small imperfections may be repaired with a suitable wall filler, while larger cracks or recurring damage should be assessed before installation.
3.2 Look for Dampness and Water Damage
Check for damp patches, mould, peeling paint and water stains. These can indicate underlying moisture problems. Identify and resolve the cause before covering the wall with PVC panels.
3.3 Identify Loose Paint and Plaster
Inspect the surface for flaking paint, loose plaster and areas that are beginning to separate from the wall. Remove unstable materials and repair the affected sections to create a sound installation base.
3.4 Check for Uneven Areas
Run a straightedge or spirit level across different sections of the wall to identify bumps, dips and irregular surfaces. Significant unevenness may require additional levelling or a suitable supporting framework.
3.5 Assess the Existing Wall Finish
Identify whether the wall has paint, wallpaper, tiles or exposed plaster. Different surfaces may require different preparation methods. Check the PVC panel manufacturer’s guidance to confirm whether the existing finish is suitable for direct installation.
Once the inspection is complete, you can identify the repairs and cleaning work needed before moving on to the installation stage.
4. How to Clean Walls Before Installing PVC Wall Panels
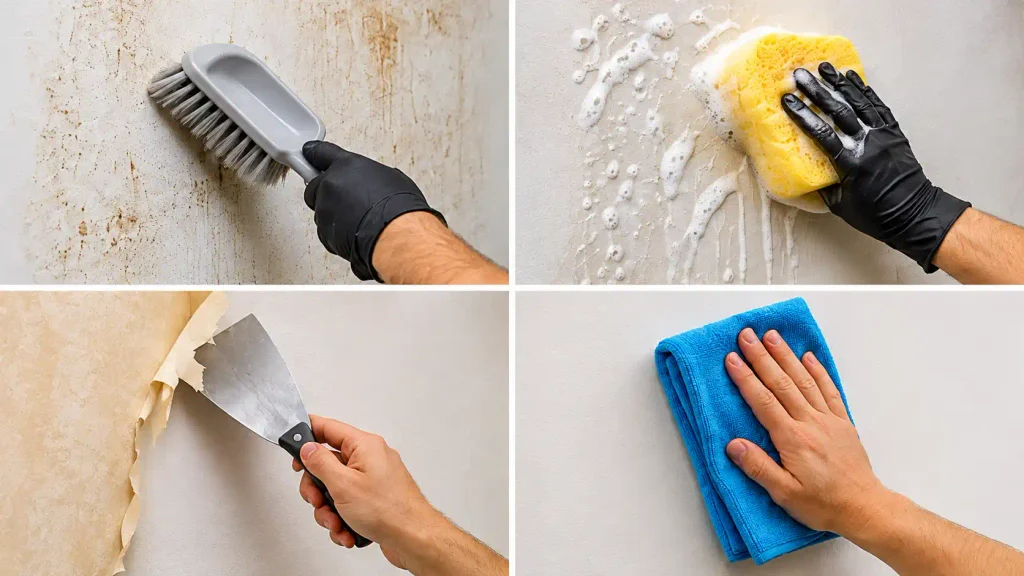
Cleaning is an essential part of wall preparation. Dust, grease, dirt and loose materials can affect the adhesion of PVC panels and create an uneven installation surface. Make sure the wall is clean before moving on to repairs or panel fitting.
4.1 Remove Dust and Loose Debris
Use a soft brush, broom or vacuum cleaner to remove dust, cobwebs and loose particles. Pay attention to corners, edges and areas around sockets where debris can collect.
4.2 Remove Grease and Surface Stains
Kitchen walls and frequently used areas may have grease or stubborn stains. Clean these surfaces with a suitable mild detergent and follow the product instructions. Avoid harsh chemicals that could damage the existing wall finish.
4.3 Remove Loose Paint and Wallpaper
Scrape away flaking paint, loose wallpaper and old adhesive where necessary. Do not install panels over unstable materials, as they may separate from the wall and affect the finished installation.
4.4 Allow the Wall to Dry Completely
After cleaning, allow the surface to dry fully. Installing PVC panels over a wet or damp wall can create moisture-related problems, so check the surface before continuing.
4.5 Check the Surface Again
Once the wall is clean and dry, inspect it again for remaining dirt, loose material or damaged areas. Complete any necessary repairs before proceeding to the next preparation stage.
A clean, dry and stable surface provides a better starting point for installing PVC wall panels.
5. How to Repair Damaged Walls Before Installing PVC Panels
After cleaning the wall, the next step is to repair any damaged or uneven areas. A stable and properly prepared surface helps create a more consistent base for PVC wall panel installation.
5.1 Fill Cracks and Small Holes
Use a suitable wall filler or repair compound to fill small cracks, holes and surface imperfections. Apply the material according to the manufacturer’s instructions and allow it to dry completely.
5.2 Repair Loose or Damaged Plaster
Remove loose plaster and unstable material before applying a suitable repair product. Larger damaged areas may require professional assessment to ensure the wall is stable enough for installation.
5.3 Remove Uneven Surface Patches
Once the filler or repair compound has dried, sand the repaired areas where appropriate. This helps remove raised edges and creates a smoother surface for the panels.
5.4 Treat Mould and Dampness
If you find mould or damp patches, identify and resolve the underlying moisture problem before covering the wall. Simply cleaning visible mould without addressing its cause can allow the problem to return.
5.5 Check the Repaired Surface
Inspect the repaired areas to make sure they are dry, stable and free from loose material. Use a straightedge to identify any remaining uneven sections that may need further attention.
Once repairs are complete, the wall should provide a more stable and consistent base for the next preparation stage.
6. How to Level Walls Before Installing PVC Wall Panels
Wall alignment is an important consideration before installing PVC wall panels. Uneven surfaces can affect panel positioning, create visible gaps and make it harder to achieve a consistent finish. Checking the wall level helps identify areas that need additional preparation.
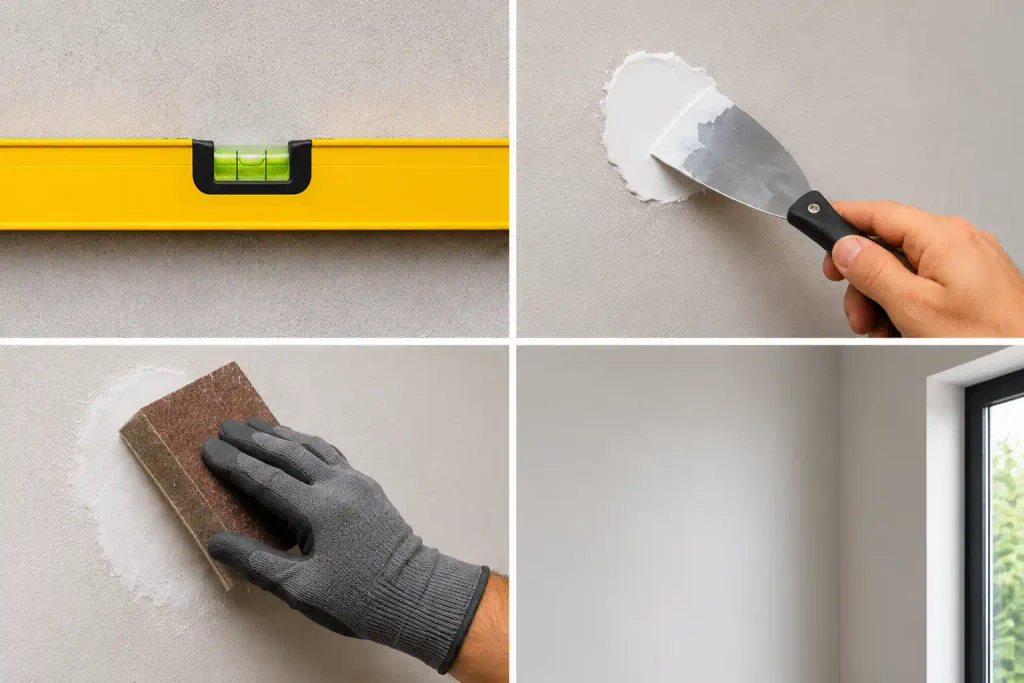
6.1 Check the Wall with a Spirit Level
Place a spirit level against different sections of the wall to identify slopes, bumps and uneven areas. Check both vertical and horizontal alignment before deciding how to correct the surface.
6.2 Identify High and Low Spots
Use a straightedge to locate raised sections and shallow dips. Mark the affected areas so you can determine whether they need sanding, filling or a suitable levelling solution.
6.3 Smooth Raised Areas
Where appropriate, carefully sand small raised patches or remove loose material. Avoid damaging the underlying wall structure, and use suitable protective equipment when sanding.
6.4 Fill Low Areas
Apply a suitable repair or levelling compound to shallow depressions. Follow the product instructions for application and drying times before sanding or continuing with installation.
6.5 Consider a Supporting Framework
If the wall is significantly uneven, a suitable batten or framework system may be required instead of attempting to correct the entire surface with filler. Check the PVC panel manufacturer’s recommendations for the correct installation method.
6.6 Recheck the Surface
After completing the adjustments, use a spirit level and straightedge again. Confirm that the surface or supporting framework is suitable for the chosen PVC panel installation system.
7. How to Check for Dampness Before Installing PVC Wall Panels
Moisture is an important issue to address before installing PVC wall panels. Covering a damp wall without resolving the underlying problem can trap moisture and contribute to mould growth, unpleasant odours and damage behind the panels.
7.1 Look for Visible Signs of Dampness
Inspect the wall for dark patches, peeling paint, water stains, mould and discoloured plaster. These signs may indicate moisture problems that need further investigation.
7.2 Check for Leaks and Water Ingress
Examine nearby plumbing, windows, ceilings and external walls for possible leaks. Repair any water ingress before preparing the surface for panel installation.
7.3 Check Moisture Levels
A suitable moisture meter can help identify damp areas that may not be visible. Compare readings across different sections of the wall and follow the guidance appropriate to the wall material.
7.4 Treat the Cause of Moisture
Address the source of dampness before proceeding. This may involve repairing plumbing leaks, improving ventilation or resolving water penetration through the building structure.
7.5 Allow the Wall to Dry Completely
After resolving the moisture problem, allow the wall to dry fully. Drying time depends on the extent of dampness, wall construction and surrounding conditions. Do not cover the surface until it is suitable for installation.
7.6 Check the Wall Before Installation
Inspect the surface again to confirm there are no remaining signs of active dampness. If moisture continues to appear, seek professional advice before installing PVC wall panels.
Remember, PVC wall panels should not be used to conceal an unresolved damp problem. Proper moisture assessment helps protect the wall structure and the finished installation.
8. Applying Primer and Preparing the Wall Surface
After cleaning, repairing and levelling the wall, check whether the surface requires a primer before installing PVC wall panels. The correct preparation depends on the existing wall material and the adhesive or fixing system being used.
8.1 Check Whether Primer Is Required
Some porous or absorbent surfaces may require a suitable primer to improve surface consistency and support adhesive bonding. Check the PVC panel and adhesive manufacturer’s recommendations before applying one.
8.2 Choose a Compatible Primer
Select a primer designed for the wall material and compatible with the chosen adhesive. Using an unsuitable product may affect adhesion or cause problems with the finished installation.
8.3 Apply Primer Evenly
Use a suitable roller or brush to apply the primer according to the manufacturer’s instructions. Avoid excessive application and make sure the surface receives an even coating.
8.4 Allow the Primer to Dry
Follow the recommended drying time before continuing. Installing PVC panels over wet primer can interfere with the bonding process, so make sure the surface is ready.
8.5 Recheck the Wall Surface
Inspect the wall for dust, loose material, remaining imperfections or areas that need further preparation. The surface should meet the requirements of the selected PVC panel installation system.
9. Final Wall Preparation Checklist Before Installing PVC Panels
Before installing PVC wall panels, complete a final inspection to make sure the surface is ready. Checking these details can help prevent avoidable installation problems and support a neat, consistent finish.
9.1 Confirm the Wall Is Clean
Make sure all dust, grease, loose paint, wallpaper and other surface contaminants have been removed.
9.2 Check All Repairs
Inspect filled cracks, holes and repaired plaster. Make sure repair materials are completely dry and any required sanding has been completed.
9.3 Confirm the Wall Is Level
Use a spirit level or straightedge to check for remaining bumps, dips and uneven sections. Make any necessary adjustments before installation.
9.4 Make Sure the Wall Is Dry
Check that there are no signs of active dampness, leaks or unresolved moisture problems. Allow cleaned and repaired areas to dry fully.
9.5 Check Primer and Surface Compatibility
If primer is required, confirm that it is compatible with the wall surface, adhesive and PVC panel installation system. Follow the recommended drying time.
9.6 Confirm Measurements and Installation Requirements
Measure the wall, plan the panel layout and check the manufacturer’s guidance for fixings, adhesives, expansion gaps and supporting frameworks.
Once these checks are complete, you can move forward with PVC wall panel installation using the recommended fitting method.
10. Common Mistakes to Avoid When Preparing Walls for PVC Panels
Proper wall preparation helps prevent installation problems and supports a neat finish. However, overlooking small details can affect panel alignment, adhesion and long-term results. Avoid these common mistakes before fitting PVC wall panels.
10.1 Installing Panels Over Damp Walls
Covering a damp wall without resolving the moisture problem can trap moisture behind the panels. Always investigate leaks, mould and damp patches before installation.
10.2 Ignoring Loose Paint and Wallpaper
Installing panels over peeling paint, loose plaster or old wallpaper can create an unstable surface. Remove loose materials and repair the affected areas first.
10.3 Skipping Surface Cleaning
Dust, grease and dirt can interfere with adhesive bonding. Clean the wall thoroughly and allow it to dry before applying adhesive or fitting panels.
10.4 Leaving Cracks and Holes Unrepaired
Unrepaired surface damage can affect how panels sit against the wall. Fill suitable cracks and holes, then allow repair materials to dry before continuing.
10.5 Failing to Check Wall Alignment
Ignoring uneven surfaces can lead to visible gaps and alignment problems. Use a spirit level or straightedge to identify areas that need levelling or a supporting framework.
10.6 Using the Wrong Primer or Adhesive
Not every primer or adhesive is compatible with every wall surface and PVC panel. Check the manufacturer’s recommendations before selecting installation products.
10.7 Rushing the Preparation Process
Installing panels before repairs, cleaning or primer have fully dried can affect the finished result. Allow sufficient drying time and complete the final inspection before installation.
Avoiding these mistakes helps create a suitable base for PVC wall panels and makes the installation process more manageable.
11. PVC Wall Panel Preparation FAQs
Walls should be reasonably flat, stable and free from loose materials. Minor imperfections may be manageable depending on the installation system, but significant uneven areas should be corrected or addressed with a suitable supporting framework.
Some PVC panel systems can be installed over existing tiles if the surface is stable, clean, dry and suitable for the chosen fixing method. Check the manufacturer’s instructions before proceeding.
Loose, flaking or peeling paint should be removed. Sound, well-adhered paint may be suitable for some installation systems, provided the surface is properly cleaned and compatible with the adhesive.
Primer is not always necessary. It depends on the wall material, surface condition and adhesive requirements. Use a compatible primer only when recommended by the relevant manufacturer.
No. Active dampness and water leaks should be investigated and resolved before installation. Covering a damp wall can conceal moisture problems and contribute to further damage.
Use a spirit level or straightedge to identify slopes, bumps and dips. Correct uneven areas where necessary or consider a suitable supporting framework if the wall is significantly irregular.
Drying time depends on the cleaning method, repair materials, primer and surrounding conditions. Follow the product instructions and make sure the surface is completely dry before installation.
Conclusion: Prepare Your Walls for a Better PVC Panel Installation
Preparing walls properly is an important step towards achieving a neat and consistent PVC wall panel installation. Cleaning the surface, repairing damage, checking alignment and resolving moisture problems can help create a suitable base for fitting the panels.
Before starting, review the manufacturer’s recommendations for surface preparation, adhesives, fixings and installation methods. Taking time to complete these checks can help reduce avoidable installation problems.
Explore the range of PVC wall panels and interior finishing solutions at GretaGrove to find options for your next renovation or installation project.